
Contact Info
2nd Floor, House-42, Road-20, Sector-11, Uttara, Dhaka-1230
+8801711-286015
info@tishost.com

cPanel Hosting
923
Sep 06,2019
How to Create Addon Domain

What is an Addon Domain?
This article will go over creating an addon domain under your cPanel account.
Requirements for Addon Domains
- Changing the nameservers
- Adding addon domain
Domain name control validation
How to Remove an Addon Domain
What is an Addon Domain?
Every Tishost hosting plan (except EasyWP) can host more than one domain name at a time; therefore, it’s possible to host more websites and email accounts without having to purchase a new hosting plan. The name for this? An addon domain name.
Requirements for Addon Domains
To add a new domain name to hosting account, there are two basic steps you need to completed. Change the nameserver of your domain name to Tishost ones. Add your domain name to the server your account is hosted on.
There are the following requirements to addon domains:
1) The domain name should be pointed to Tishost Hosting DNS:
- For Shared - dns1.namecheaphosting.com and dns2.Tishosthosting.com.
- For Reseller - your private nameservers or Reseller Hosting nameservers.
If you prefer to use PremiumDNS or any third-party nameservers, it will be required to proceed with the validation process described in step 3.
You can change the nameservers for the domains registered with Tishost using this guide. If it is a third-party domain, please change the nameservers on your Registrar's side.
2) The domain should not be present in the same hosting account as an addon or as a main domain name.
You can also find video tutorial here.
Follow the instructions below to add an addon domain.
Step 1 – Change the nameservers
To begin with, you will need to point your domain name to our hosting nameservers:
- For Shared Hosting plans: dns1.namecheaphosting.com and dns2.namecheaphosting.com.
- For Reseller Hosting: your private nameservers or Reseller Hosting nameservers specified in your Welcome Email.
Guidelines on how to change your nameservers to Shared Hosting for domain names that are registered with Tishost can be found here or in video format here.
If your domain name is registered with a third-party registrar, contact their customer support and ask to change the nameservers for your domain name to the aforementioned ones.
Step 2 – Add the new domain as an Addon Domain
If the domain name is pointed to our hosting nameservers, it can be added to your hosting account right away.
1. Log into your cPanel. For the quick access, you may use cPanel Shortcuts.
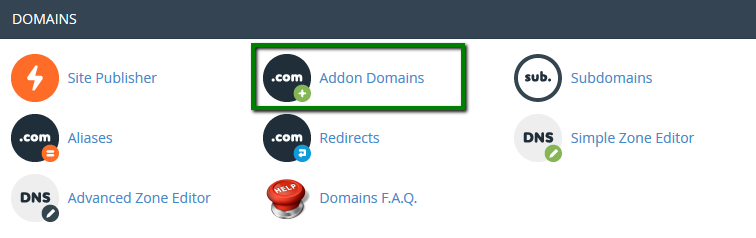
2.Navigate to the Domains section >> the Addon Domains menu:
For cPanel Basic Theme:
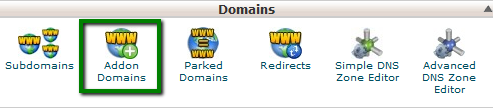
For cPanel Retro Theme:
3. Enter the necessary information in the Create an Addon Domain section.
New Domain Name: domain name you wish to add as an addon
To avoid the error message, That is not a valid domain, make sure there are no extra spaces before and after your addon domain name.
Subdomain: will be filled in automatically
Document Root: will be filled in automatically
If you wish to create an FTP account for your addon domain name, check the option Create an FTP account associated with this Addon Domain.
- FTP Username: will be filled in automatically
- Password: password for the associated FTP account
- Password (Again): repeat the password
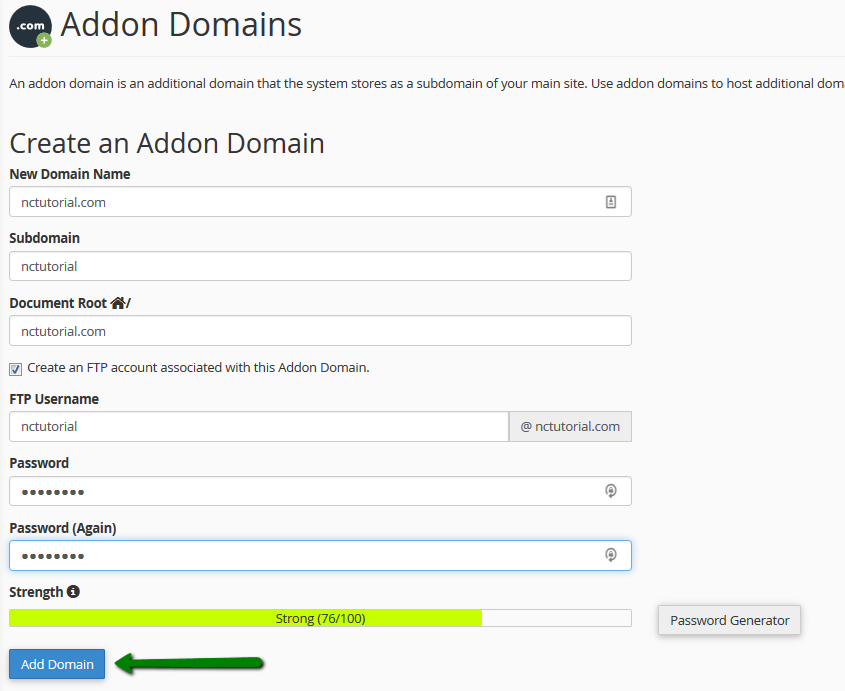
4. Click Add domain.
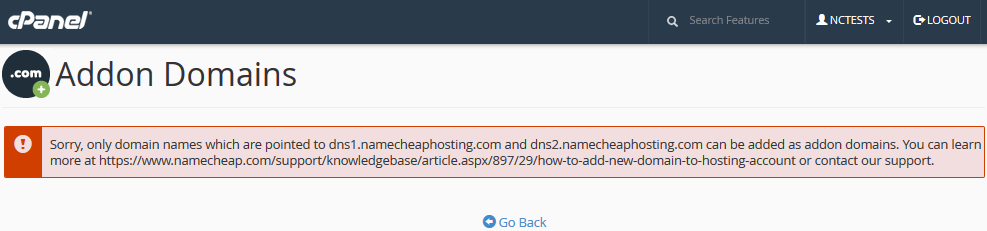
If your domain name was not pointed to our hosting nameservers beforehand, you will receive an error message when adding an addon domain:
Sometimes, it's not possible to point your domain name to our hosting name servers. Here are a few reasons why:
- Certain domain name types require a DNS zone file to be created on the hosting provider's side in advance
- You wish to create a website first and connect the domain name with it later
- You wish to keep the domain name pointed to third-party nameservers
In such cases, proceed with the validation process described below.
Domain name control validation
If there isn’t a way to change the nameservers for your domain name, you must complete the required domain name validation process:
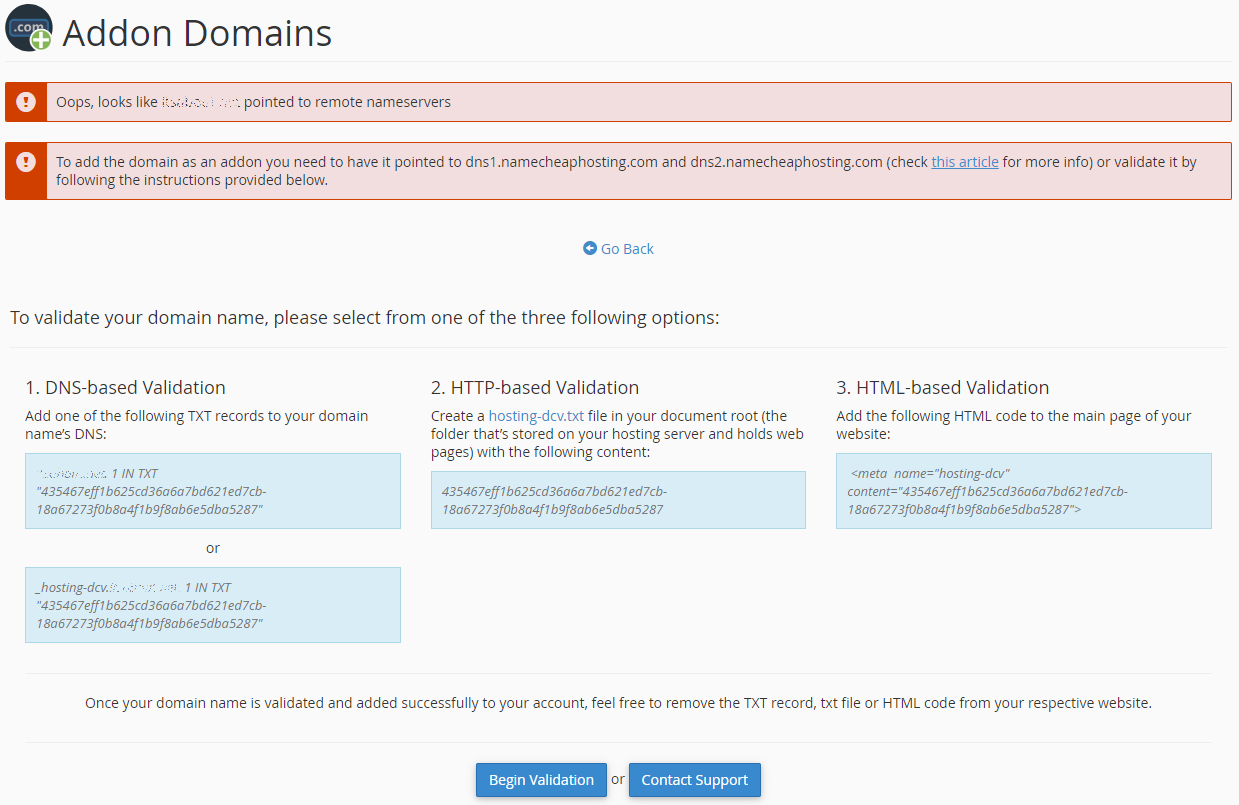
In order to be able to add your domain name, you must proceed with one of the required validation options:
- DNS-based Validation (the TXT record should be created in DNS zone of your domain on the side of DNS provider)
- HTTP-based Validation (the HTML file should be created on the side of your current hosting provider)
- HTML-based Validation (the provided code should be added to the head section of the main website page on the side of your current hosting provider)
PLEASE NOTE: The provided validation code is only valid for 1 day.
As soon as the required validation record is created, go to Begin Validation. Video version of this manual can be found here.
If there are any issues with the validation, get in touch with our Hosting Support department via Live Chat or Ticket.
You may now upload content for your new domain name into the corresponding document root. More information on how to upload your website can be found here.
If you wish to create an email account for your newly-added domain name, feel free to refer to this guide.
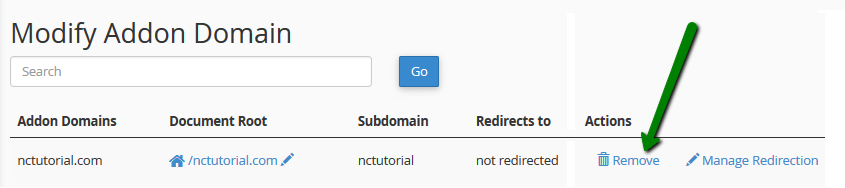
How to Remove an Addon Domain
A video version of this paragraph can be found here.
If you need to remove an addon domain name, go to the Addon Domains menu >> click on Remove to proceed:
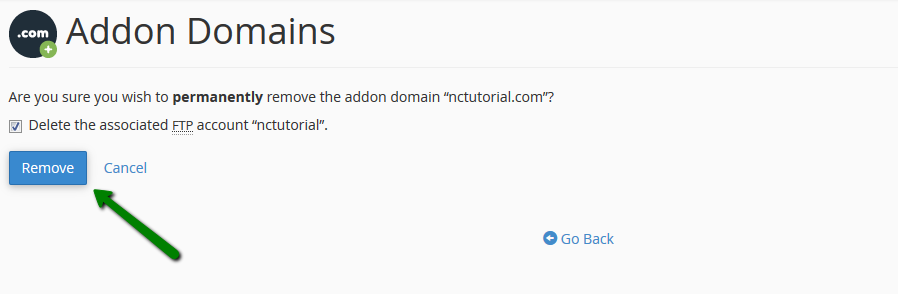
Check the Delete the associated FTP account option if you wish to delete the FTP account for your addon domain name from the FTP Accounts menu in your cPanel, then click Remove:
PLEASE NOTE: The document root, as well as the content associated with the removed addon domain name, will still be present in your File Manager. If you would like these files to be deleted as well, you will need to remove the corresponding folder from File Manager manually.
That's it!
"Our guide will help you understand the underlying principles of WordPress optimization"
Rasalina Willamson
Ut enim ad minima veniam, quis nostrum exercitationem ullam corporis suscipit laboriosam, nisi ut aliquid ex ea commodi consequatur Quis autem vel eum iure reprehenderit qui in ea voluptate velit esse quam nihil molestiae
Share this Post
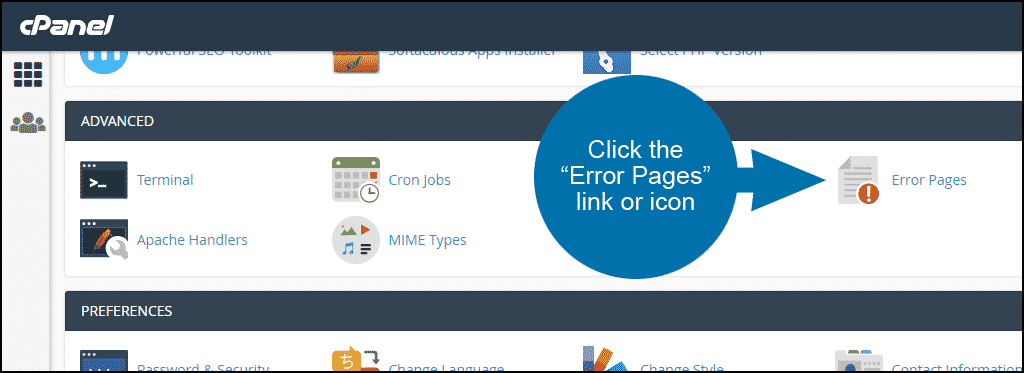
How to add custom error pages
By TisHost
How to set up URL Frame in cPanel
By TisHostRecent News
-

-

How to Create Addon Domain1
By TisHost -

How to add custom error pages1
By TisHost -

How to use File Manager in cPanel1
By TisHost -


Trusted By
900+
Client World wide
24x7x365
Professional Technical Support
Providing Cloud
Services
Since 2008
Network Uptime
99.9%
Server Uptime